
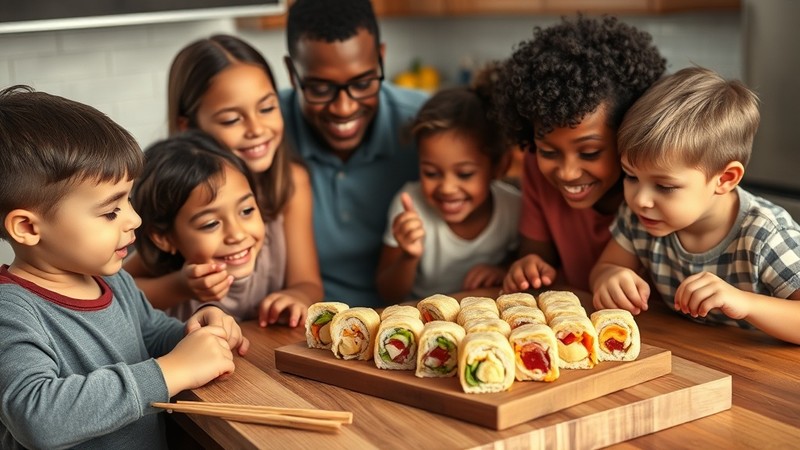
Peanut Butter and Jelly “Sushi”: An Easy-to-Make Snack That Kids Will Love
Turn lunchtime into an adventure with this creative twist on the classic PB&J sandwich
Looking for a way to make snack time more exciting? Want to get your kids interested in trying new foods or helping in the kitchen? This Peanut Butter and Jelly “Sushi” is exactly what you need! Don’t worry—there’s no raw fish involved. This creative recipe transforms the beloved Canadian classic into bite-sized rolls that look just like sushi but taste like childhood comfort food.
This fun twist on the traditional peanut butter and jelly sandwich has become a hit with families across Canada, and for good reason. It’s incredibly easy to make, requires no cooking, and turns an ordinary snack into something that feels special and adventurous. Plus, it’s a fantastic way to get reluctant eaters excited about food and encourage kids to help in the kitchen.
Why Kids (and Parents!) Love PB&J Sushi
Perfect for Picky Eaters
If you have a child who’s hesitant to try new foods, this recipe is a game-changer. The familiar flavours of peanut butter and jelly remain exactly the same, but the fun presentation makes the experience feel new and exciting. Many parents report that their picky eaters are more willing to eat when food looks “fancy” or different from the usual offerings.
Interactive and Educational
Making PB&J sushi is an excellent opportunity to teach children basic kitchen skills like spreading, rolling, and cutting (with supervision). It also opens the door to conversations about different cultures and foods from around the world. You can talk about real sushi, Japanese cuisine, and how food traditions vary across different countries.
Allergy-Friendly Options
With the rise in food allergies, especially peanut allergies in schools, this recipe is easily adaptable. You can substitute the peanut butter with sunflower seed butter, almond butter, or any other nut or seed butter that works for your family’s needs.
What You’ll Need
Basic Ingredients:
- Fresh bread (white or whole wheat work best - avoid grainy breads that might crack)
- Peanut butter (creamy spreads easier than crunchy, but both work)
- Jam or jelly (grape and strawberry are classics, but any flavour works)
Optional Ingredients for Variations:
- Honey (instead of or in addition to jelly)
- Banana slices (adds sweetness and nutrition)
- Cream cheese (creates a different flavour profile)
- Cinnamon (sprinkle lightly for extra flavour)
- Mini chocolate chips (for special occasions)
Tools You’ll Need:
- Rolling pin (or a clean glass/bottle)
- Sharp knife for cutting
- Cutting board
- Butter knife for spreading
- Clean kitchen towel
Step-by-Step Instructions
Step 1: Prepare Your Workspace
Set up a clean workspace with all your ingredients and tools within reach. This is a great time to get your kids involved—let them help gather supplies and wash their hands thoroughly.
Step 2: Flatten the Bread
Take a slice of fresh bread and place it on a clean cutting board. Using a rolling pin, gently roll over the bread to flatten it. The goal is to make it thin and pliable without tearing it. If you don’t have a rolling pin, the side of a clean glass or bottle works perfectly.
Pro tip: Slightly stale bread actually works better than very fresh bread, as it’s less likely to tear when rolling.
Step 3: Spread Your Fillings
Using a butter knife, spread a thin, even layer of peanut butter across the flattened bread, leaving about a half-inch border on one end (this will help seal your roll). Next, add a thin line of jelly or jam across one edge of the bread. Less is more here—too much filling will make rolling difficult and messy.
Step 4: Roll It Up
Starting from the edge with the jelly, carefully roll the bread tightly but gently. The peanut butter will help hold everything together. Roll away from yourself, keeping the roll as tight as possible without squishing out the filling.
Step 5: Seal and Rest
Place the roll seam-side down and let it rest for 2-3 minutes. This helps the roll hold its shape when you cut it.
Step 6: Slice Your “Sushi”
Using a sharp knife, carefully slice the roll into rounds about 1-inch thick. Wipe the knife clean between cuts to keep your “sushi” looking neat. You should get 6-8 pieces from each slice of bread.
Step 7: Serve and Enjoy
Arrange your PB&J sushi on a plate and serve immediately. For the full experience, provide chopsticks (great for developing fine motor skills!) or let kids eat with their fingers.
Creative Variations to Try
The Rainbow Roll
Use different coloured jams in thin stripes across the bread before rolling. Strawberry, apricot, and grape jams create beautiful colour combinations when sliced.
The Protein Power Roll
Add thinly sliced banana or a sprinkle of hemp hearts for extra nutrition. This version is perfect for active kids who need sustained energy.
The Dessert Roll
Substitute Nutella for peanut butter and add mini marshmallows or chocolate chips. This version is perfect for special occasions or weekend treats.
The Savory Surprise
Try cream cheese with cucumber slices, or hummus with shredded carrots for kids ready to explore beyond sweet options.
Making It Allergy-Friendly
Nut-Free Alternatives
- Sunflower seed butter: The closest taste and texture match to peanut butter
- Soy butter: Another popular school-safe option
- Pea butter: A newer option that’s gaining popularity
- Coconut butter: For a tropical twist
Gluten-Free Options
Use your family’s preferred gluten-free bread. Some brands work better than others for rolling, so you might need to experiment to find one that doesn’t crack easily.
Sugar-Conscious Versions
- Use sugar-free jams or jellies
- Try mashed fresh berries instead of jam
- Use honey in moderation as a natural sweetener
Educational Opportunities
Cultural Learning
This recipe opens wonderful opportunities to learn about Japanese culture and cuisine. You can:
- Show pictures of real sushi and explain the differences
- Discuss how different cultures have their own special foods
- Learn basic Japanese words like “arigato” (thank you) and “oishi” (delicious)
- Practice using chopsticks
Kitchen Skills Development
Making PB&J sushi helps children develop:
- Fine motor skills through spreading and rolling
- Following directions by working through the recipe steps
- Measurement concepts when discussing “thin layers” and portion sizes
- Safety awareness when using knives (with supervision)
Perfect Occasions for PB&J Sushi
Lunch Box Stars
These travel well and won’t get soggy like traditional sandwiches might. Pack them in a small container with a cold pack to keep everything fresh.
Birthday Parties
Kids love the novelty, and parents appreciate that it’s not too sugary. Set up a “sushi bar” where kids can make their own with different jam flavours.
Sleepover Snacks
Easy enough for kids to make themselves, and the fun factor makes it perfect for slumber party activities.
After-School Energy
The combination of protein, carbs, and natural sugars provides sustained energy for homework and activities.
Rainy Day Activities
When you’re stuck inside, this recipe provides entertainment and a tasty reward all in one activity.
Storage and Food Safety Tips
Best Served Fresh
PB&J sushi is best eaten immediately after making, but it can be stored in the refrigerator for up to 24 hours in an airtight container.
Food Safety Considerations
- Always use clean utensils and wash hands thoroughly
- If packing for school, include a cold pack to keep perishable ingredients safe
- Check school policies regarding peanut products before sending to school
Troubleshooting Common Issues
Bread Keeps Tearing
- Try slightly older bread that’s less soft
- Roll more gently
- Make sure your rolling pin is clean and smooth
Filling Leaks Out
- Use less filling—thin layers work better
- Make sure to leave that border when spreading
- Roll more tightly from the beginning
Rolls Fall Apart When Cutting
- Let the roll rest longer before cutting
- Use a sharper knife
- Make sure the peanut butter layer extends to the edges
Nutritional Benefits
While this is definitely a fun snack rather than a health food, PB&J sushi does offer some nutritional value:
- Protein from the nut or seed butter helps with growth and development
- Carbohydrates from bread provide quick energy
- Natural sugars from fruit-based jams offer immediate energy
- Healthy fats from nut butters support brain development
Getting Kids Involved Safely
Age-Appropriate Tasks
- Ages 3-5: Spreading fillings, helping roll (with guidance)
- Ages 6-8: Using the rolling pin, arranging finished pieces
- Ages 9+: Cutting with supervision, leading the entire process
Safety First
- Always supervise knife use
- Teach proper hand washing
- Discuss cross-contamination if making multiple varieties
- Keep the workspace organized to prevent accidents
Building on the Fun
Once your family masters basic PB&J sushi, you can explore other “sushi” inspired snacks:
- Cream cheese and cucumber rolls for a savory option
- Cinnamon sugar rolls using butter and cinnamon sugar
- Pizza rolls with tomato sauce and mozzarella
- Fruit leather rolls with cream cheese
Making Memories in the Kitchen
The best part about PB&J sushi isn’t just the delicious result—it’s the time spent together in the kitchen. This simple recipe creates opportunities for conversation, learning, and laughter. Don’t worry about making it perfect; focus on having fun and enjoying the process together.
Many families report that making PB&J sushi has become a regular tradition, something kids request for special occasions or when friends come over. It’s one of those simple pleasures that reminds us that the best family activities don’t need to be complicated or expensive.
Final Thoughts
PB&J sushi proves that with a little creativity, you can transform everyday ingredients into something special. It’s a perfect example of how presentation can make familiar foods feel new and exciting, encouraging kids to engage with their food in positive ways.
Whether you’re looking for a new lunch box option, a fun rainy-day activity, or a way to get picky eaters excited about snack time, this recipe delivers on all fronts. The best part? You probably already have everything you need right in your kitchen.
So grab some bread, peanut butter, and jelly, and get ready to roll up some fun. Your kids will love the novelty, you’ll appreciate the simplicity, and everyone will enjoy this delicious twist on a Canadian classic.
Ready to try it? Start with the basic version, then let your family’s creativity guide you toward new and exciting variations. Before you know it, you’ll have your own signature “sushi” style that becomes part of your family’s food traditions.