
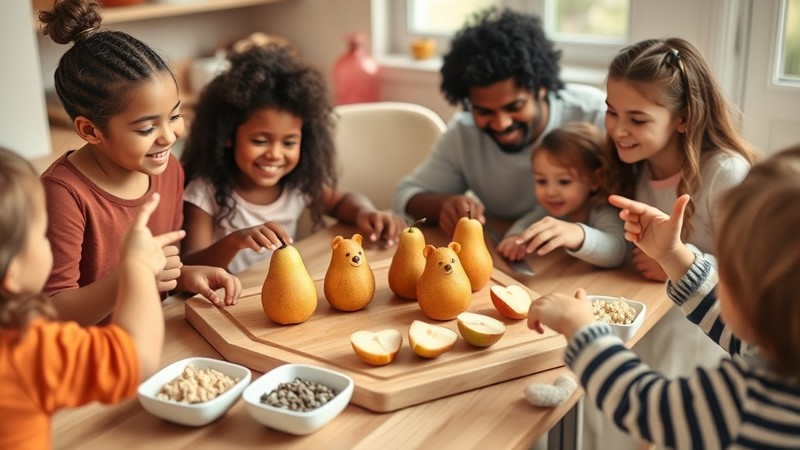
Turn snack time into playtime with this simple, nutritious treat that takes just two minutes to make
Getting kids excited about healthy snacks can feel like an uphill battle, but what if we told you that you could transform an ordinary pear into an adorable bear that kids will be thrilled to eat? This charming brown pear bear recipe combines nutrition with creativity, making it the perfect solution for parents who want to encourage healthy eating habits while adding a touch of whimsy to snack time.
The beauty of this recipe lies in its simplicity – using just two main ingredients and requiring no cooking, it’s accessible to even the most kitchen-shy parents. Plus, it’s an excellent way to get children involved in food preparation, teaching them basic knife safety (with supervision) and encouraging creativity with their food.
Why Pears Make the Perfect Healthy Snack
Before we dive into creating our adorable bear friend, let’s talk about why pears are such an excellent choice for growing children. Pears are nutritional powerhouses packed with essential vitamins and minerals that support healthy development.
Nutritional Benefits of Pears:
- High in Fibre: One medium pear provides about 6 grams of dietary fibre, which supports healthy digestion and helps kids feel satisfied longer
- Vitamin C: Essential for immune system support and wound healing
- Potassium: Important for heart health and proper muscle function
- Antioxidants: Help protect cells from damage and support overall health
- Natural Sugars: Provide quick energy without the crash associated with processed sugars
- Low in Calories: A medium pear contains only about 100 calories, making it a guilt-free snack
Pears are also naturally hypoallergenic, making them suitable for most children, including those with common food sensitivities. Their soft texture makes them easy for young children to chew and digest, while their natural sweetness appeals to kids’ taste preferences.
Ingredients You’ll Need
The magic of this recipe is that it requires minimal ingredients – most of which you likely already have in your kitchen:
Essential Ingredients:
- 1 ripe brown pear (Bosc or Anjou varieties work best)
- 1 fresh blueberry (for the nose)
Optional Decorative Elements:
- 2 candy eyes (available at most grocery stores in the baking aisle)
- 2 additional blueberries (if you prefer not to use candy eyes)
- Small pieces of dark berries or raisins (for alternative facial features)
Tools Required:
- Sharp paring knife (adult use only)
- Cutting board
- Clean plate for serving
Step-by-Step Assembly Instructions
Creating your pear bear is surprisingly simple, but following these detailed steps will ensure the best results:
Step 1: Prepare Your Workspace
Set up a clean cutting board and have your plate ready for assembly. If children are helping, this is a great time to talk about kitchen safety and the importance of adult supervision when using sharp tools.
Step 2: Create the Bear’s Snout
Remove the stem from your pear if present. Using a sharp knife, carefully slice about 1 inch off the top of the pear. This piece will become your bear’s snout, so try to make it roughly circular. The cut should be clean and even to ensure it sits nicely on the bear’s face later.
Step 3: Form the Head
Slice about half an inch off the bottom of the pear to create a stable, flat surface. Place this piece cut-side up on your serving plate – this forms the bear’s head. The white flesh should face upward, providing a nice contrast for the facial features.
Position the snout piece (from Step 2) on the lower portion of the head, slightly overlapping the edge. This creates the distinctive bear muzzle shape that makes the snack instantly recognizable.
Step 4: Shape the Body
From your remaining pear, slice off one side, cutting just before you reach the core. This long, curved piece becomes the bear’s body. Position it underneath the head on your plate, with the widest part at the top to create natural-looking shoulders.
Step 5: Remove the Core
Carefully slice out and discard the core from your remaining pear piece. You should now have a section of pear that you can use for the smaller body parts.
Step 6: Create Arms, Legs, and Ears
This is where creativity comes into play! From your remaining pear piece, cut:
Ears (2 pieces): Create small circular or oval shapes. For added detail, you can create a layered effect by cutting a smaller brown piece (with skin) to place inside a larger white piece (flesh only).
Arms (2 pieces): Cut rectangular pieces about 1-2 inches long. These should be proportionate to your bear’s body size.
Legs (2 pieces): Similar to arms but slightly larger and positioned at the bottom of the body.
Arrange these pieces around your bear, positioning ears at the top of the head and arms and legs extending from the body.
Step 7: Add Facial Features
Place your blueberry on the tip of the snout to create an adorable nose. If using candy eyes, position them above the snout on the bear’s face. If using blueberries for eyes, cut them in half to create flat surfaces that will stay in place better.
Creative Variations and Alternatives
Once you’ve mastered the basic pear bear, try these fun variations to keep snack time exciting:
Seasonal Adaptations
- Fall Theme: Use small pieces of orange bell pepper for autumn leaves around your bear
- Winter Scene: Add small marshmallows as “snowflakes” around the plate
- Spring Garden: Include small pieces of green vegetables as grass or flowers
Different Fruit Bears
- Apple Bears: Use red or green apples for different coloured bears
- Pear and Apple Combination: Mix pear and apple pieces for a two-toned bear
- Miniature Bears: Use small pears to create bite-sized versions perfect for lunch boxes
Alternative Facial Features
- Raisin Features: Use raisins for eyes and nose for a completely natural option
- Chocolate Chip Eyes: For special occasions, use mini chocolate chips
- Nut Pieces: Small pieces of almonds or other nuts (ensure no allergies) for different textures
Involving Kids in the Process
Making pear bears is an excellent opportunity to get children involved in food preparation while teaching valuable skills:
Age-Appropriate Tasks
Ages 2-4:
- Washing the pear
- Placing pre-cut pieces on the plate
- Adding blueberry nose and eyes
- Describing what they’re creating
Ages 5-8:
- Helping arrange pieces with guidance
- Learning about pear nutrition
- Practicing following step-by-step instructions
- Creative decoration choices
Ages 9+:
- Supervised knife use for softer cutting tasks
- Leading the creation process for younger siblings
- Experimenting with their own design variations
- Understanding food safety principles
Educational Opportunities
Use pear bear creation time to discuss:
- Nutrition: What makes pears healthy and why our bodies need different nutrients
- Creativity: How food can be both nutritious and fun
- Following Directions: The importance of sequence and careful listening
- Fine Motor Skills: Precision in placing small pieces develops hand-eye coordination
Storage and Make-Ahead Tips
While pear bears are best enjoyed immediately after creation, here are some strategies for advance preparation:
Preventing Browning
- Lemon Juice Method: Lightly brush cut pear pieces with lemon juice to slow oxidation
- Timing: Cut pears just before assembly and serving
- Cold Storage: Keep cut pieces refrigerated until ready to use
Make-Ahead Strategies
- Pre-wash pears and have all tools ready
- Cut decorative elements (like halved blueberries) in advance
- Create an assembly line if making multiple bears for a group
Storage Guidelines
- Assembled bears should be eaten within 2 hours of creation
- Individual cut pieces can be stored in the refrigerator for up to 24 hours when properly covered
- Always use fresh, ripe pears for the best taste and texture
Nutritional Benefits for Growing Children
Understanding the nutritional impact of this snack helps parents feel confident about offering it regularly:
Digestive Health
The high fibre content in pears supports healthy digestion and can help prevent constipation, a common issue in young children. The natural sugars provide quick energy without the artificial additives found in processed snacks.
Immune System Support
The vitamin C content helps strengthen children’s immune systems, particularly important during school months when kids are exposed to various germs and viruses.
Hydration
Pears have high water content, contributing to daily hydration needs – especially important for active children who may not drink enough water throughout the day.
Natural Energy
The natural fruit sugars provide sustained energy without the sugar crash associated with processed snacks, making pear bears an excellent choice for after-school snacking.
Troubleshooting Common Challenges
Even simple recipes can present challenges. Here’s how to handle common issues:
Pear Too Soft or Too Hard
- Too Soft: Use immediately and handle gently; consider this an opportunity to discuss ripeness with kids
- Too Hard: Let ripen at room temperature for 1-2 days, or choose a different variety
Pieces Won’t Stay in Place
- Solution: Slightly flatten contact surfaces or use a tiny bit of natural nut butter as “glue” (if no allergies)
- Prevention: Choose pears that are ripe but still firm
Kids Lose Interest Quickly
- Engagement Strategy: Let them tell you a story about their bear or give it a name
- Involvement: Ask them to help problem-solve placement issues
- Validation: Celebrate their creativity and effort, regardless of the final appearance
Building Food Confidence Through Creative Snacks
Creating food art like pear bears does more than provide nutrition – it builds positive associations with healthy foods and encourages children to be more adventurous eaters. When kids participate in food preparation, they’re more likely to try new foods and develop lifelong healthy eating habits.
This simple activity teaches children that healthy food doesn’t have to be boring, and that creativity can be part of every meal. It’s also an excellent way to spend quality time together while accomplishing the practical goal of providing nutritious snacks.
Perfect Occasions for Pear Bears
These adorable snacks are versatile enough for many occasions:
- After-school snacks when kids need quick energy
- Lunch box surprises that will make classmates envious
- Playdate treats that are both fun and parent-approved
- Rainy day activities that combine creativity with nutrition
- Birthday party alternatives for health-conscious celebrations
- Teaching moments about nutrition and food preparation
Expanding the Adventure
Once your family has mastered pear bears, consider expanding into other fruit animals or food art projects. This could become a weekly tradition where you explore different fruits, learn about their nutritional benefits, and create edible art together.
The skills learned making pear bears – following directions, using kitchen tools safely, and combining creativity with nutrition – transfer beautifully to other cooking and baking adventures as children grow.
Remember, the goal isn’t perfection but rather creating positive food experiences that will serve your children well throughout their lives. Every wobbly ear and lopsided smile is a step toward building confidence, creativity, and healthy eating habits that will benefit them for years to come.
So grab a pear, gather your little helpers, and get ready to create some deliciously adorable memories in your kitchen today!